collectionViewCellの中にLabelを配置したい。
1. StoryBoardで設置する方法
新たなファイルを作らず簡単に設置できる。
cell内にLabel配置→Tagを1にする→コードを書く
//セルに情報を入れる関数
    func collectionView(_ collectionView: UICollectionView, cellForItemAt indexPath: IndexPath) -> UICollectionViewCell {
        //表示するセルの登録
        let cell = collectionView.dequeueReusableCell(withReuseIdentifier: "Cell", for: indexPath)
        cell.backgroundColor = .white //セルの色

        //境界線
        cell.layer.borderColor = UIColor.lightGray.cgColor
        cell.layer.borderWidth = 0.3

        //ラベル
        let label = cell.contentView.viewWithTag(1) as! UILabel
        label.text =  "hi"
        label.textColor = UIColor.red

        return cell
    }
2. collectionViewCellファイルを別に作ってコードで配置する方法
Storyboard上でラベルを設置しなくてよい。
サブクラスがcollectionViewCellのファイル「CollectionViewCell.swift」を作成
→storyboardのcellに対応するCustomClassをさっき作った「CollectionViewCell」に設定
→CollectionViewCell.swiftで以下のようにLabelを生成して必要なコードを書く
import UIKit

class CalendarCell: UICollectionViewCell {

    var textLabel: UILabel!

    required init(coder aDecoder: NSCoder) {
        super.init(coder: aDecoder)!

        // UILabelを生成
        textLabel = UILabel(frame: CGRect(x: 0, y: 0, width: self.frame.width / 6, height: self.frame.height / 5))
        textLabel.font = UIFont(name: "HiraKakuProN-W3", size: 13)
        textLabel.textAlignment = NSTextAlignment.center
        textLabel.text = "a"
        textLabel.backgroundColor = .lightGray
        textLabel.textColor = .black
        // Cellに追加
        self.addSubview(textLabel!)
    }

    override init(frame: CGRect) {
        super.init(frame: frame)

    }
}

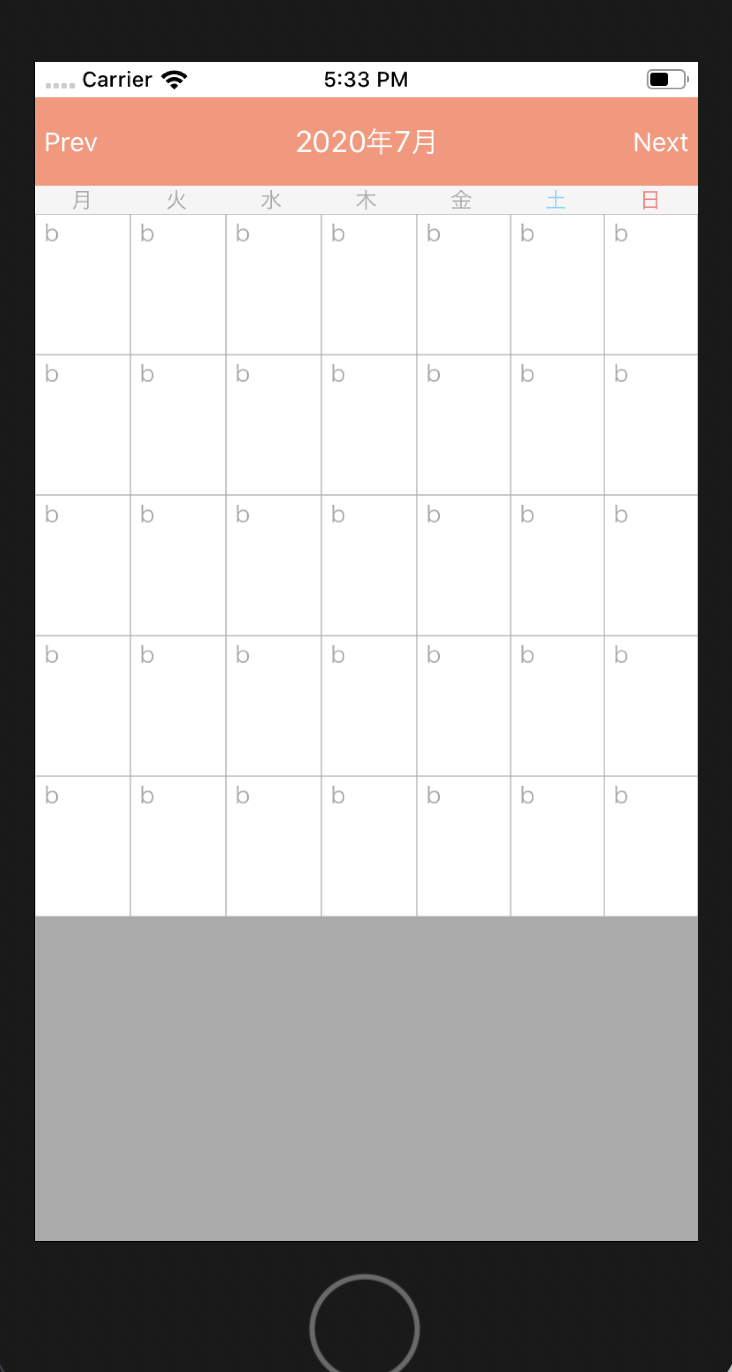
・補足:CollectionViewCell.swiftで生成したlabelをViewController.swiftで扱う方法
//表示するセルの登録
let cell = collectionView.dequeueReusableCell(withReuseIdentifier: “cell”, for: indexPath) as! CalendarCell
最後にas! CalendarCellをつけることで、cell.textLabel.text = “b”みたいに使える。
//セルに情報を入れる関数
    func collectionView(_ collectionView: UICollectionView, cellForItemAt indexPath: IndexPath) -> UICollectionViewCell {
        //表示するセルの登録
        let cell = collectionView.dequeueReusableCell(withReuseIdentifier: "cell", for: indexPath) as! CalendarCell
        cell.backgroundColor = .white
        //境界線
        cell.layer.borderColor = UIColor.lightGray.cgColor
        cell.layer.borderWidth = 0.3

        //テキスト
        cell.textLabel.text = "b"
        return cell
    }